OVERVIEW: Windows, Batch Print-to-Fax Steps
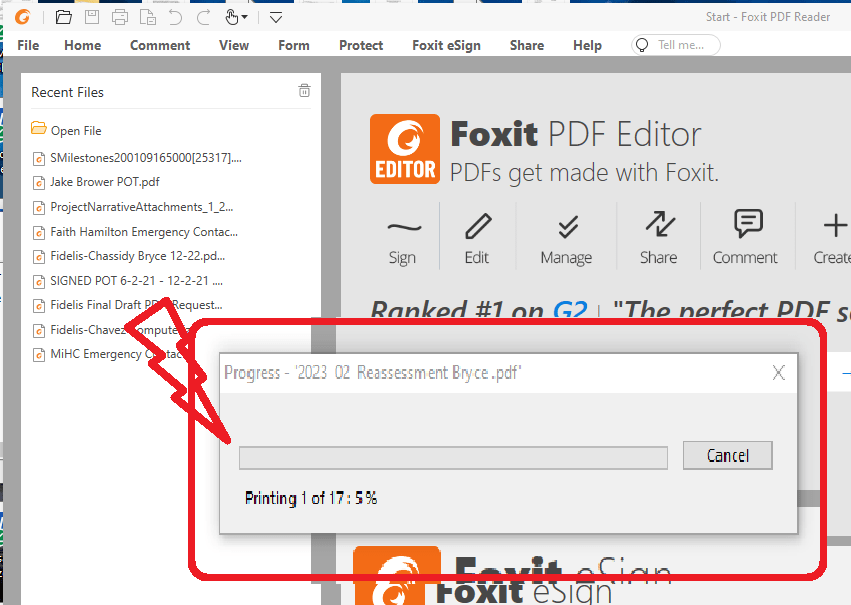
Foxit PDF Reader has a bunch of built in resources, including batch printing… allowing you to gather multiple documents into a single printjob.
Windows 10/11 and the Konica Minolta mutli-function devices at Milestones also have tricks up their sleeves, allowing office staff to PRINT to FAX
Combined, these two features allow office staff to fax multiple documents in a batch as needed for insurance reauthorization among other needs.
Below is the step by step to Batch Faxing (from a Windows PC via the Konica Minolta Bizhub machines).

DETAILED STEPS:Print-to-Fax ~ written notes
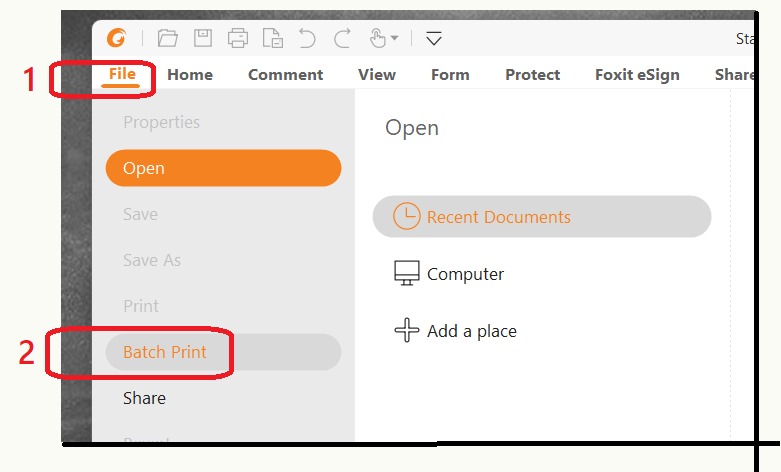
Step 1: Launch Foxit & select Batch Print from the File pull down menu.
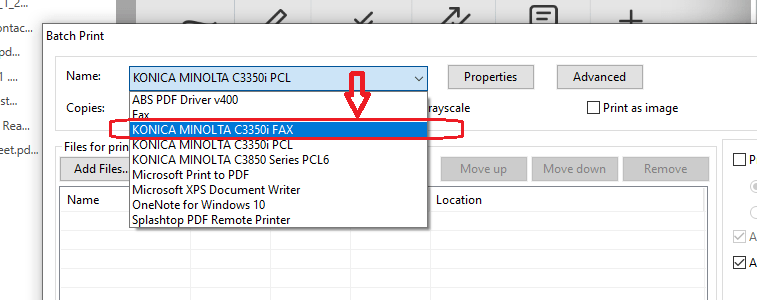
Step 2: Select the FAX version of the printer, using the pulldown at the top of the Batch Print window.
Step 3: Check the box to Print as Image for the best resolution.
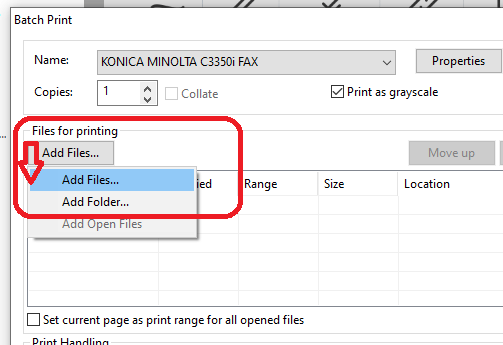
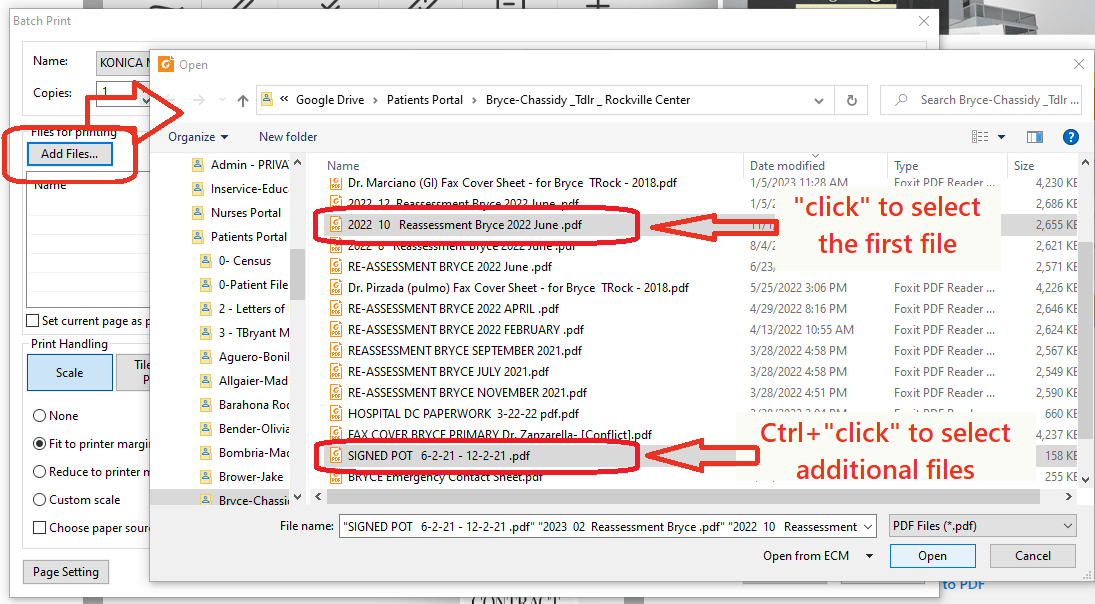
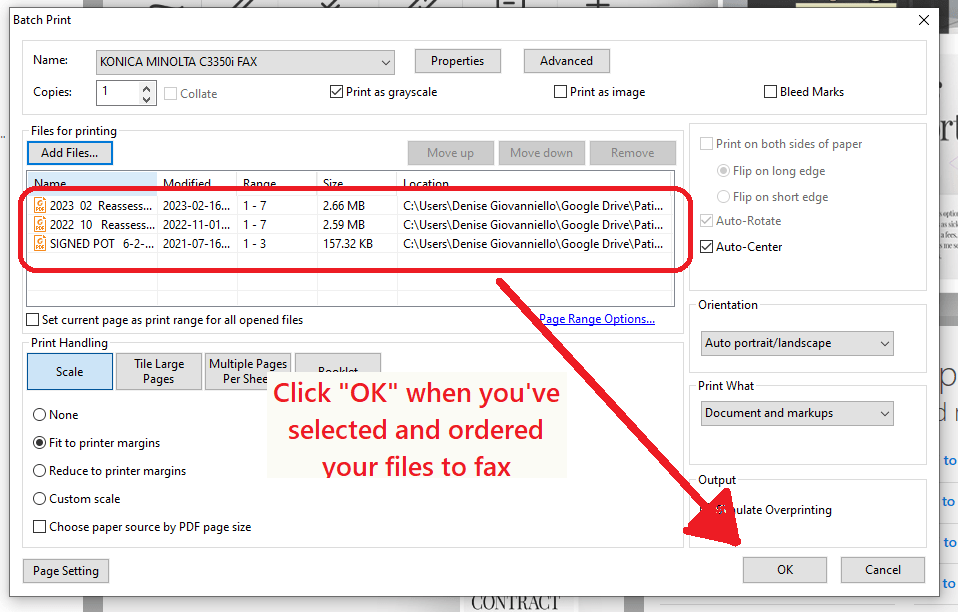
Step 4: Click “Add Files” & select the documents you’d like sent in bulk (reorder as needed), and click OK.
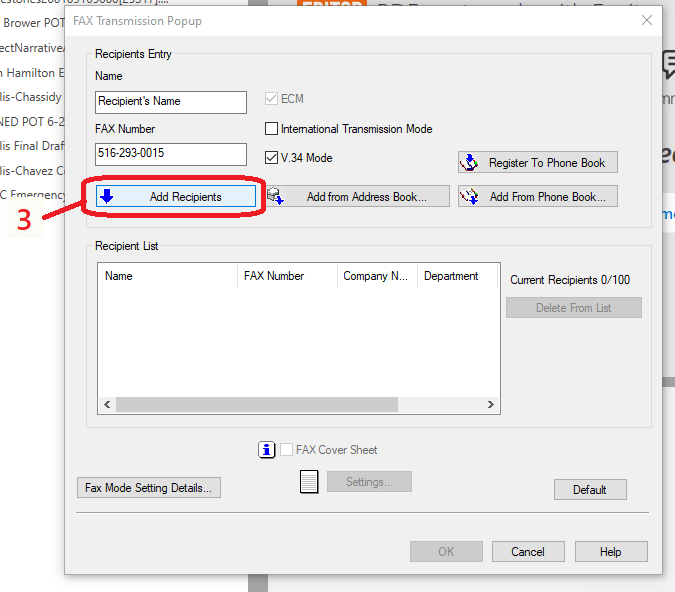
Step ~~: A new window appears… Fax Transmission Popup
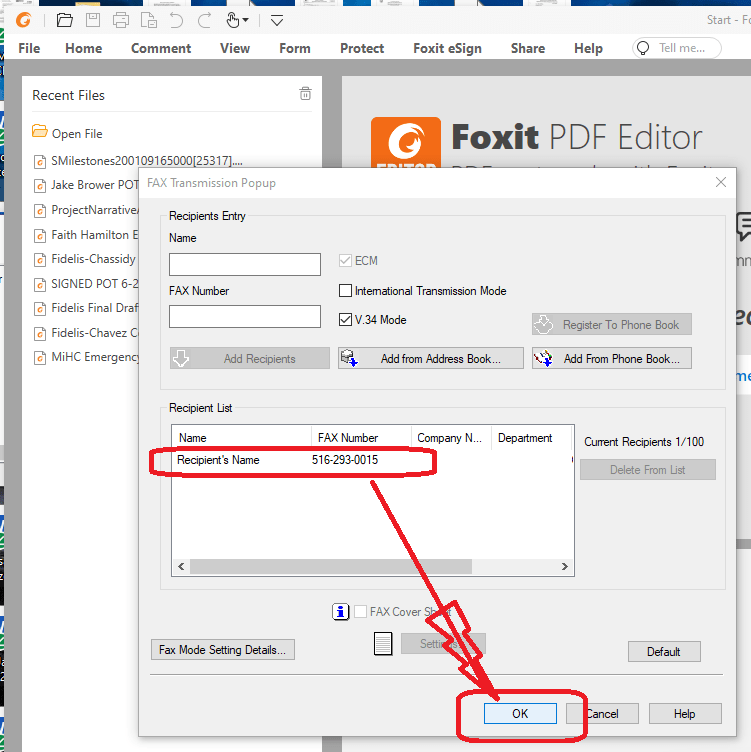
Step 5: Enter the recipient information — name in one field and number in the second… then click “Add Recipient”. (The inner box for Recipients should populate with the information you entered above.)
Step 7: Click Okay on the Fax Transmission Popup window to send the document.
DETAILED STEPS:Print-to-Fax ~ with images
Step 1: Launch Foxit & select Batch Print from the File pull down menu.
Step 2: Select the FAX version of the printer, using the pulldown at the top of the Batch Print window.
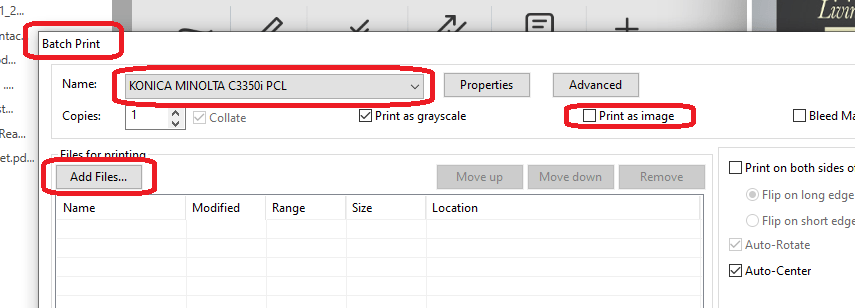
Step 3: Check the box to “Print as Image” for the best resolution.
Step 4: Click “Add Files” & select the documents you’d like sent in bulk (reorder as needed), and click OK.
Step ~~: A new window appears… Fax Transmission Popup
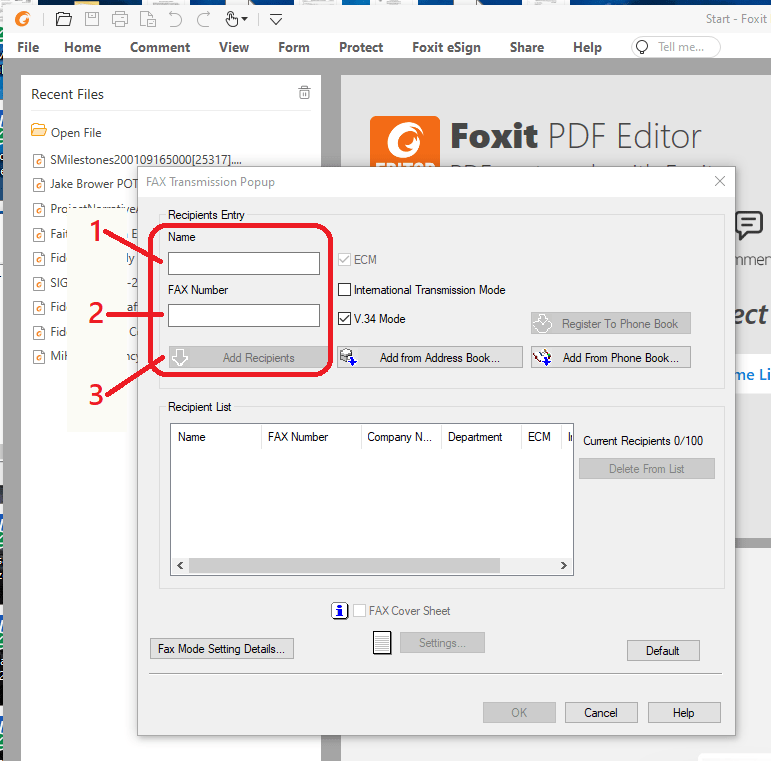
Step 5: Enter the recipient information — name in one field and number in the second… then click “Add Recipient”. (The inner box for Recipients should populate with the information you entered above.)
Step 7: Click Okay on the Fax Transmission Popup window to send the document.